
Homebuyers & renovators
Check the room before you change the layout.
Give your agent a 3D scan of the space and ask the question that matters: will the island fit, can the sofa get through, or how do these two layouts compare? Inspect the measurements before deciding.
Answer a specific question about your home.
Will a longer island leave enough space in the kitchen? Can the new sofa pass through the entrance? Why do two floor plans show different room sizes? Before a renovation, these are practical questions about the place you are buying or living in.
CADground gives your AI agent tools to explore the scan, select points, measure features, and compare a proposed layout. See which part of the room it is checking. Ask for corrections in the same chat.
Start with one room and one decision. You can check the space around a kitchen island or prepare dimensions for a contractor without modeling the whole building.
“Will it fit, including the space around it?”
Supply the product dimensions. Ask whether it fits and how much passage space remains. Include doors, handles, drawers, and the delivery route where relevant. Furniture can fit in its final position but still be too large for the entrance.
“Can you compare these two layout options?”
Keep the existing scan as the reference. Give proposed objects clear names. Compare both layouts using the same dimensions and requirements. State what matters to you: walking space, storage access, a dining area, or room for an appliance.
“Can I send the contractor a clear plan and questions?”
Ask for a view with measurements, a short dimension list, and questions for a site visit. Label checked dimensions and proposed changes so the contractor can tell them apart.
Try a kitchen and living-room layout
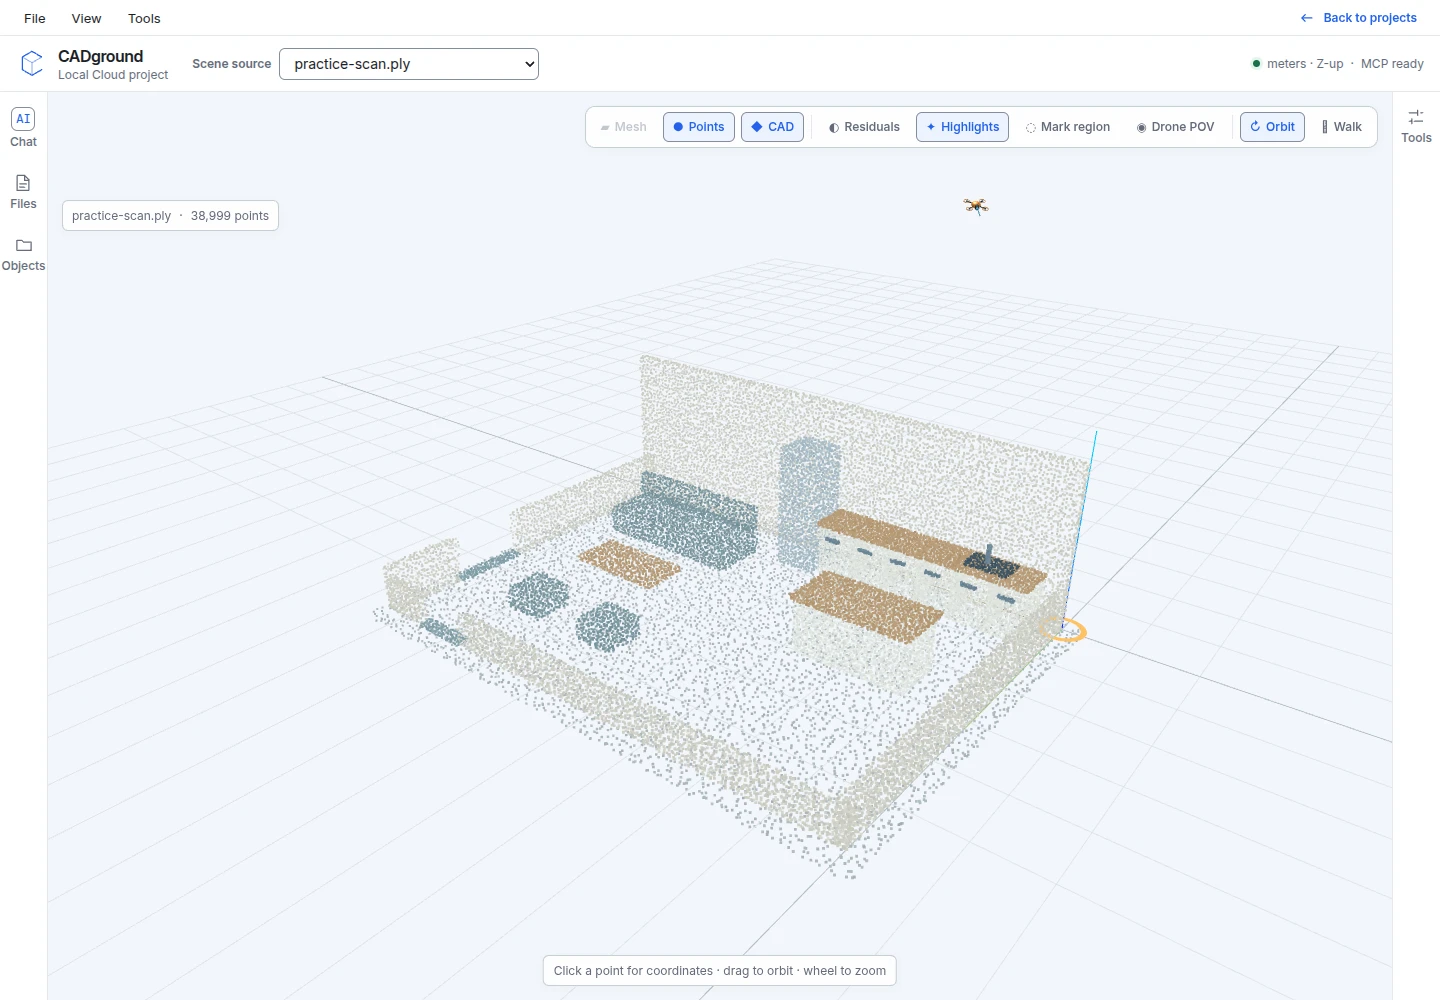
The practice scene has kitchen cabinets, a refrigerator, an island, living-room furniture, and two openings. The roof and upper outer walls are cut away. This is an original synthetic example, not a scan of someone’s home.
- Scene
- Kitchen and living room · layout check
- Practice task
- Measure the current kitchen aisle and compare a longer island with the existing room arrangement.
- File
- RGB point cloud · PLY · 38,999 points · 0.59 MB
- Coordinates
- Metres, Z-up. The scene has no geographic reference or stated survey accuracy.
- About the data
- Original synthetic practice data. Points were sampled from surfaces, then moved by small random amounts. The CSV lists the original dimensions used to create the scene. They are not CADground measurement results.
To try it: download the PLY. Create an account or sign in. Create a project and choose the downloaded file. Select Start with these files. Add the reference CSV through Files. Follow the steps below. The upload guide shows each control.
The sample was built with an island top 1.90 m long. The gap between the rear counter edge and island edge is 1.30 m. Compare it with a 2.40 m island for this exercise. Keep the rear edge and height unchanged. Ask the agent to show where the extra length goes and what space remains at each end.
These are the dimensions used to create the sample before adding random point offsets. For your own scan, measure a wall or opening with a tape or laser measure. Give that reference to the agent. A scan can look correct but still have a scale or capture error.
Prepare measurements and layout options
-
Capture the room and access route
Use a professional survey, a phone scanning app, or an app that builds 3D data from photographs. See the capture guide for methods and export formats. Before scanning a whole property, check that your app can export a file CADground supports.
Capture the doorway, floor, relevant walls, cabinets, and visible pipes. Move around objects to record several sides. Keep useful photographs and a few measurements taken with a tape or laser measure.
-
Create a project and upload the scan
Sign in and create a project with a room name you will recognize. Choose the scan and select Start with these files. After it opens, add a floor plan, product dimensions, or photographs through Files. The first-project guide shows the controls with labeled screenshots.
Look around the scene. Check that it is upright. Confirm the units and a known dimension. Record missing doorways or wall areas. The agent cannot reliably measure a boundary the scan does not show.
-
Ask your question in ordinary language
Name the object, the change, and the result you want. You do not need a CAD command. Include the product size and say which nearby objects must stay in place.
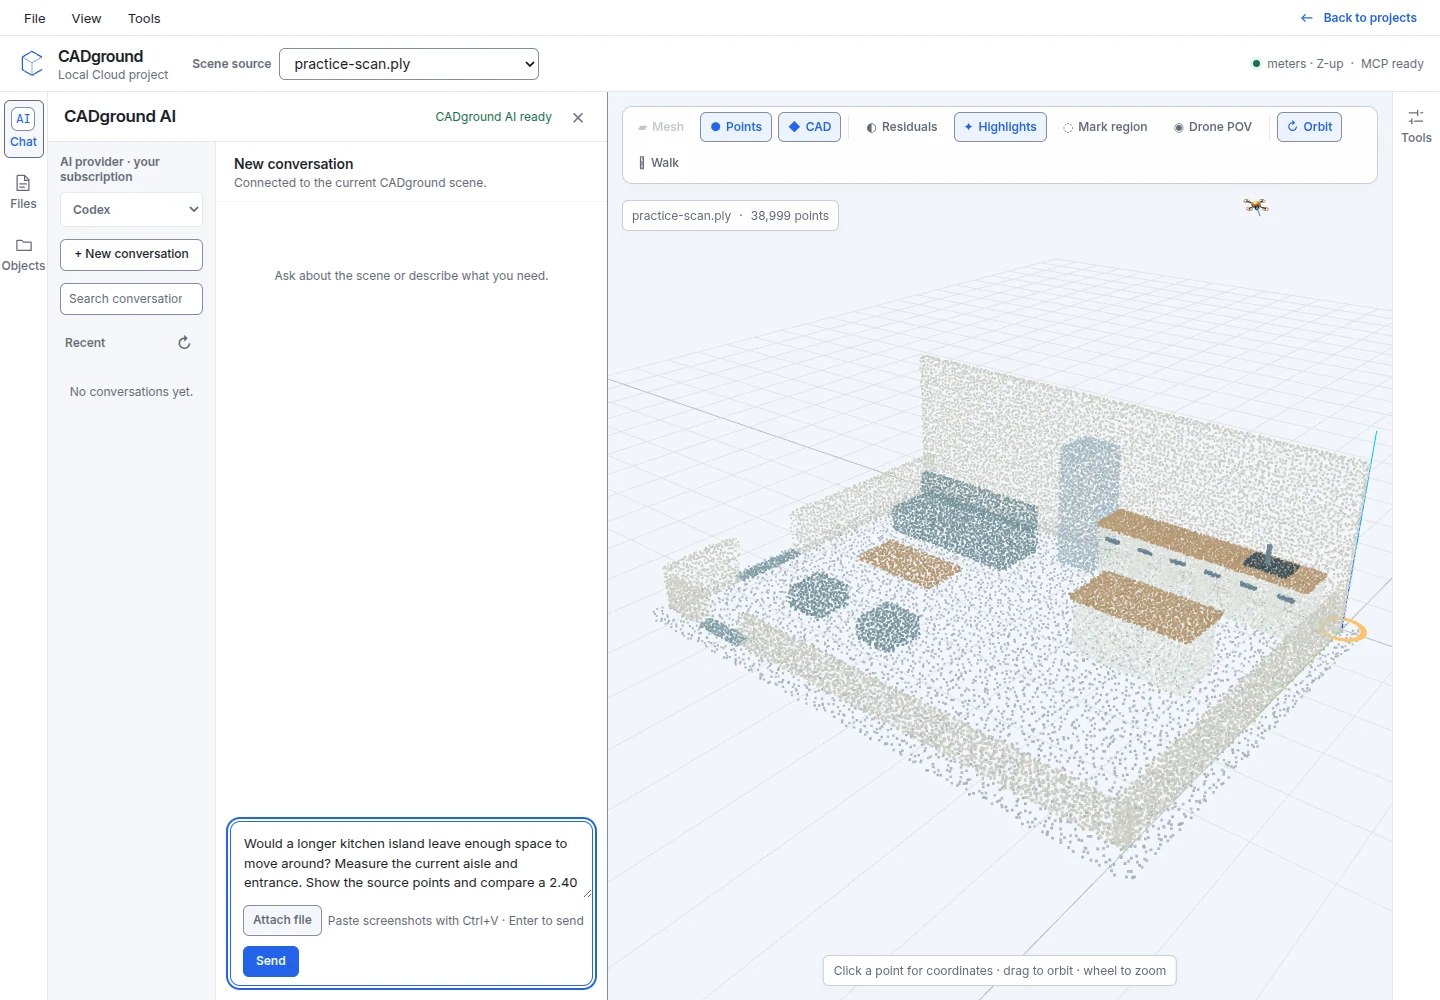
I want to replace this island with one that is 2.40 m long. Keep its rear edge and height unchanged. Measure the current island and the space around it. Show two positions for the new island. Explain which nearby openings or furniture need a closer check.
To choose an AC location, supply the unit’s size and installation requirements. Ask the agent to check the visible space. Have it list missing information about service connections and installation.
-
Check the measurements before comparing the proposal
Ask the agent to show the endpoints or faces it used. For a kitchen aisle, measure between the edges that limit the passage. Do not use a diagonal between unrelated points. A handle or worktop overhang can reduce the clear gap.
Show exactly where the kitchen-aisle measurement starts and ends. Use the worktop edges. Compare it with my tape measurement, and explain any difference before positioning the new island.
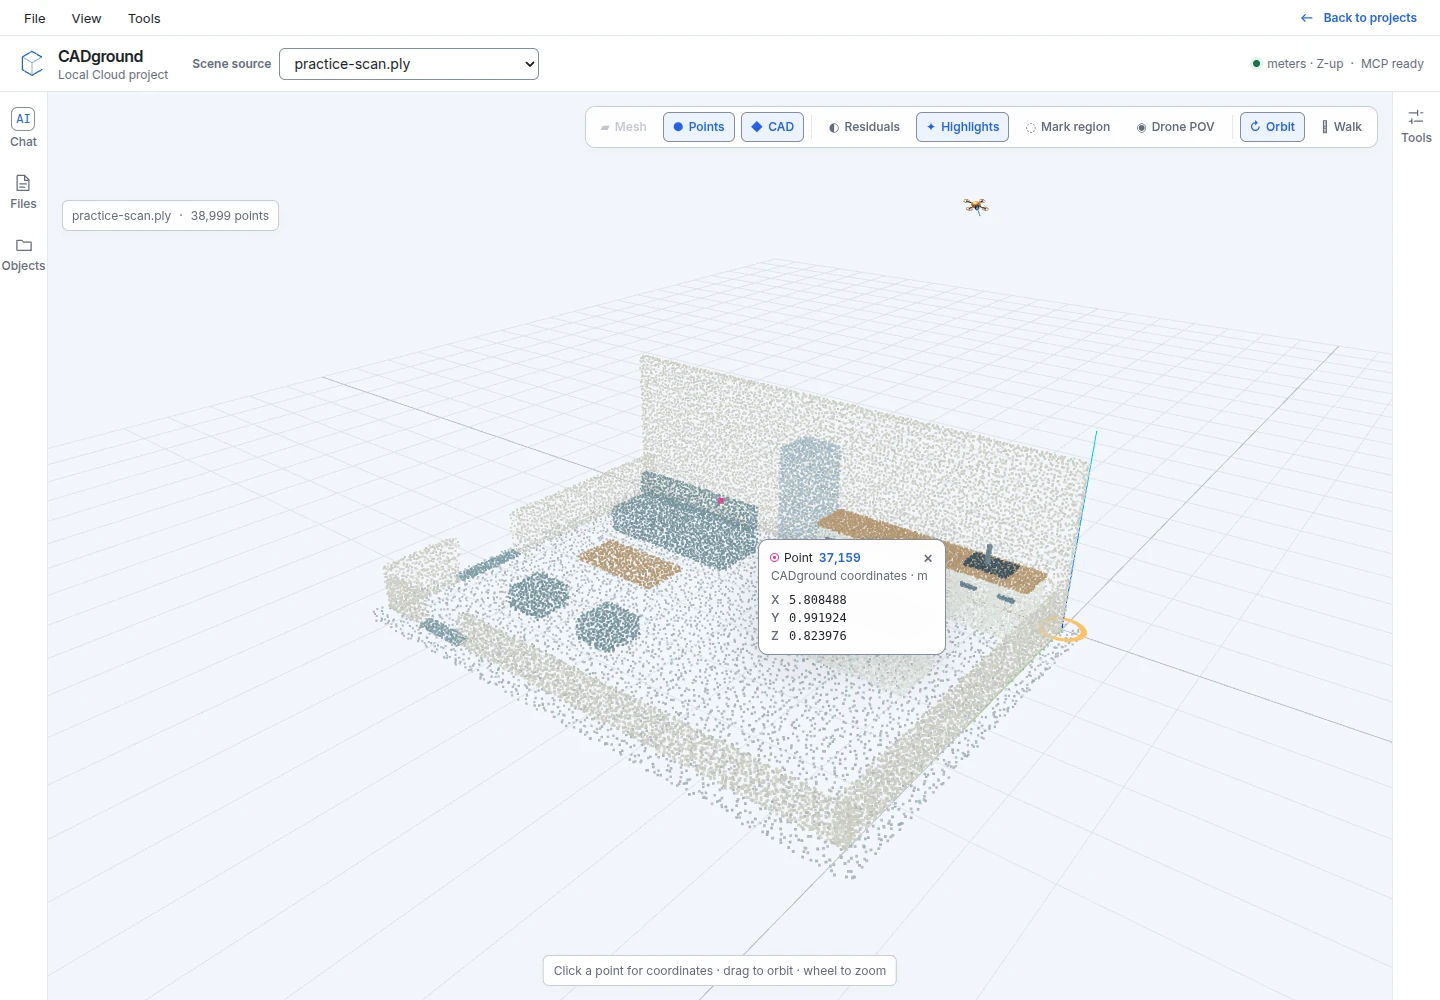
Click visible points to read their coordinates. Inspect the scene from above and from the side. One point’s coordinates show its position. To measure a distance, you need two endpoints or two defined surfaces.
-
Show existing and proposed objects clearly
Give proposed objects clear names, such as “Island option A.” Keep the scan visible. Check the full footprint, height, nearby openings, and fixed objects.
For furniture delivery, check the entrance and full route as well as the final position. Measure any route section missing from the scan. Before changing walls or services, gather property records and the professional advice you need. A surface scan does not show what is hidden inside a wall.
-
Prepare a brief for your contractor
Ask for a short brief with current dimensions, proposed product sizes, labeled views of each option, and site questions. Open generated reports or images in Files → Outputs. Read them before downloading. Upload an example brief or report template as a project file and ask the agent to follow its layout when presenting dimensions, proposed options, views from the 3D scan, and site questions.
Ask which format your contractor or designer can use. Images and checked dimensions may be enough for a first discussion. For geometry, CADground exports STEP, STL, and CADground JSON. It does not export native SketchUp SKP or DWG files.
A brief you can discuss with a contractor
Label measurements, preferences, and proposed changes separately. This helps the contractor check the room and discuss your choices.
| Include | Example | Check |
|---|---|---|
| Existing dimensions | Current island length, counter-to-island gap, entrance opening. | Units, exact edges and your physical reference measurement. |
| Proposed changes | Product dimensions and a labeled position for each option. | Label the proposal clearly. Keep fixed objects in place. |
| Views | Top view for the layout and a side view for height or obstruction. | Readable labels and enough context to recognize the room. |
| Questions for the visit | Missing route sections, hidden pipes or cables, unclear openings, or unknown product clearances. | Each question states what needs checking and why it affects the choice. |
Before buying furniture or ordering fitted work, confirm the dimensions that determine whether it fits. Use a measuring method suitable for the item. Use CADground to compare options and identify measurements you still need.
Practical questions
Do I need to know CAD?
You can start with a question about a named object or area. You still need to inspect the result, supply product information, and check important dimensions. The workspace guide explains views, point selection, layers, and panels step by step.
Do I need a professional scanner or a particular phone?
You can learn with a small phone scan. Some jobs need a professional survey. See the capture guide for device requirements and export formats, including Scaniverse and other capture options.
Can it find pipes and cables inside a finished wall?
A surface scan records what was visible. If you scan pipes and cables before closing a wall, keep the dated scan, photographs, and reference measurements. A scan taken after the wall is finished cannot show routes that were never captured.
What if I only have an estate-agent floor plan?
Use it as a reference and check its dimensions at the property. A floor plan can explain the layout, but uploading it does not automatically create a measured 3D scene. If two plans disagree, identify the disputed dimensions and measure them.
Can I use my own AI assistant?
If your project supports it, connect your assistant through MCP. This gives it tools to explore the scene, select points, and work with geometry. Attaching a point-cloud file to an ordinary chat does not provide those tools.
Continue with your first project, asking the agent, or the equipment-fit workflow for a more technical placement study.
Start with one room and one decision.
Try the kitchen sample, follow the first-project guide, and bring your own scan and product dimensions when you are ready.