
Your first project
Go from an empty account to one checked measurement. You can use a demo before capturing any data of your own.
Before you start
Use a current desktop browser with hardware acceleration enabled. You also need a stable internet connection and access to your email. A mouse or trackpad helps you move around the 3D scene. The built-in Chat needs no local CAD installation or AI API key.
Already have an account? Sign in and skip to creating a project. Have your own scan? Check formats and units first. Otherwise, use a demo in step 3.
1. Create your account
- Open Create an account.
- Enter an Organization name. The organization will own your projects. Use your company name or a name for your personal work.
- Enter your Email, Password, and Confirm password. Use at least eight characters for the password.
- Select Create account. Complete email verification if prompted. Open the confirmation message in your mailbox and follow its link.
- Sign in with the same email address. If you belong to more than one organization, select the one in which you want to work.
Check: you should reach the Cloud application and be able to open Projects. If you are waiting for verification, check your spam folder before trying to create a second account.
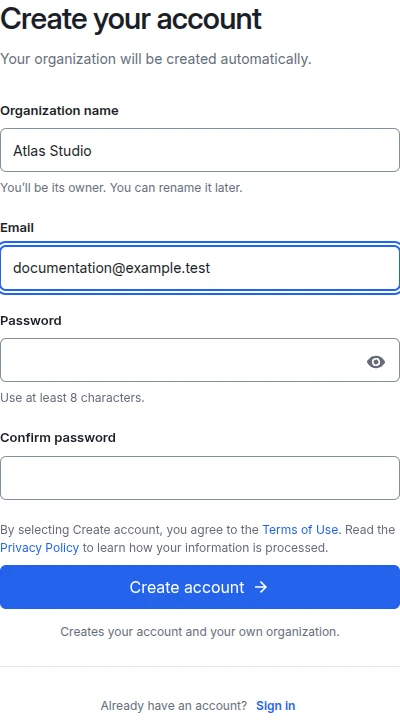
Example organization and email only. Enter your own details; no account needs to be created with the example address.
- Organization name. Enter your company or team name. This creates the organization that will own your projects.
- Email. Use the address you want to sign in with. Check its spelling before continuing.
- Confirm password. Enter the same password in both password fields. Follow the minimum length shown in the form.
- Create account. Read the linked terms and privacy policy, then submit the form. Correct any error shown before you continue.
2. Create and open a project
- Open Projects and choose the action to create a project.
- On Create a project, enter a clear Project name, such as “Plant room — first scan”. Add a description if useful.
- Select Create project. Wait for CADground to prepare the project. You will upload the scan in a later step.
- Open the project details and select Open in CADground when the project is ready.
Check: the editor shows an upload area or the project’s saved scene. Free allows one project per organization until that project is deleted. Archived projects still count. One project can contain several scenes, so you do not need a new project for each file.
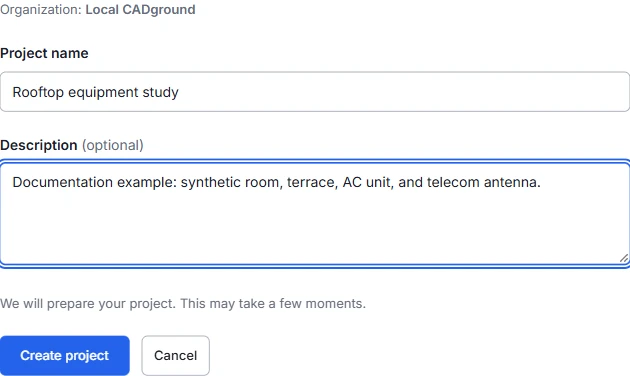
Local demonstration project. The organization and environment labels on your account may differ.
- Project name. Use a site, building, or task name you can recognize later.
- Description. Describe the task. Check that the organization shown below is the one that should own the project.
- Create project. Submit once, then wait for the project page and environment status.
3. Load a demo or your scan
- For a first trial, select a demo preview and then Use this demo. This copies the demo into your project.
- For your own data, select Choose files. Choose the point cloud or supported 3D model. Add any reference drawings or images. Then select Start with these files.
- Wait for upload and processing to finish. Select the intended scene using Scene source if more than one is available.
- Use View → Fit scene. Confirm that the correct building, room, or object is visible.
Check: the scan appears in the 3D view. A PDF or photo stays in Files as a reference. It does not become a 3D scan. If you need to capture data, follow Capture your data.
4. Ask the agent to inspect first
Select Chat on the left. Select + New conversation. Enter this request:
Inspect the current scene from several views. Describe the main objects, the coordinate system, and any missing or unreliable scan areas. Do not change geometry yet.
Select Send. Read the response. Open Details to see which tools the agent used. Check that it identified the objects correctly before asking for measurements.
5. Make one measurement you can check
Pick a visible opening, wall, or equipment gap. Replace the object names in this example with names that make sense in your scene:
Measure the clear width of the doorway on the wall facing this view. Show both endpoints. Report the result in millimeters and include a view with labels. Tell me if either endpoint is hidden.
- Check that the marked opening is the one you intended.
- Inspect both endpoints. They should lie on the relevant physical edges, not furniture or background points.
- Compare the result with a known dimension, if you have one. Correct any scale error before taking more measurements.
- If necessary, reply in the same conversation: “Use the inner faces of the jambs, not the outer trim. Measure again and show the endpoints.”
6. Save a useful result
The project saves scene changes as they happen. Ask for a short report you can download. Include the measurement, units, labeled view, source name, and any uncertain results. Open Files to download the report. For CAD files, use the geometry export controls.
On Free, keep the editor open while the agent works. If you close every editor tab for the scene, the task stops after a short period allowed for reconnection. Opening the editor again does not restart the task.
You are ready to continue when: you can identify the source scene, explain where the measured points are, and find the result in your project. Continue with the editor controls or asking better project questions.