
Files, saving, and exports
Understand what stays in the project, how to download a report, and which geometry format to use.
Find project files
- Open the editor for the correct project.
- Select Files on the left.
- Choose Uploads for supplied files or Outputs for generated results. Browse folders or use the file filter.
- Select a file to preview it when its format is supported.
- Select Download to save the file to your device. You can download a file even if its format has no preview.
Original uploads are usually in files/. Generated files are in outputs/. An analysis/ subfolder can contain views and calculations used during the work. If there are several versions, ask the agent which file is final.
Use Upload files or drop files into the panel to add references. Some entries are read-only. When Delete is available, deleting a file is different from hiding geometry in the viewport; keep source files needed by the scene.
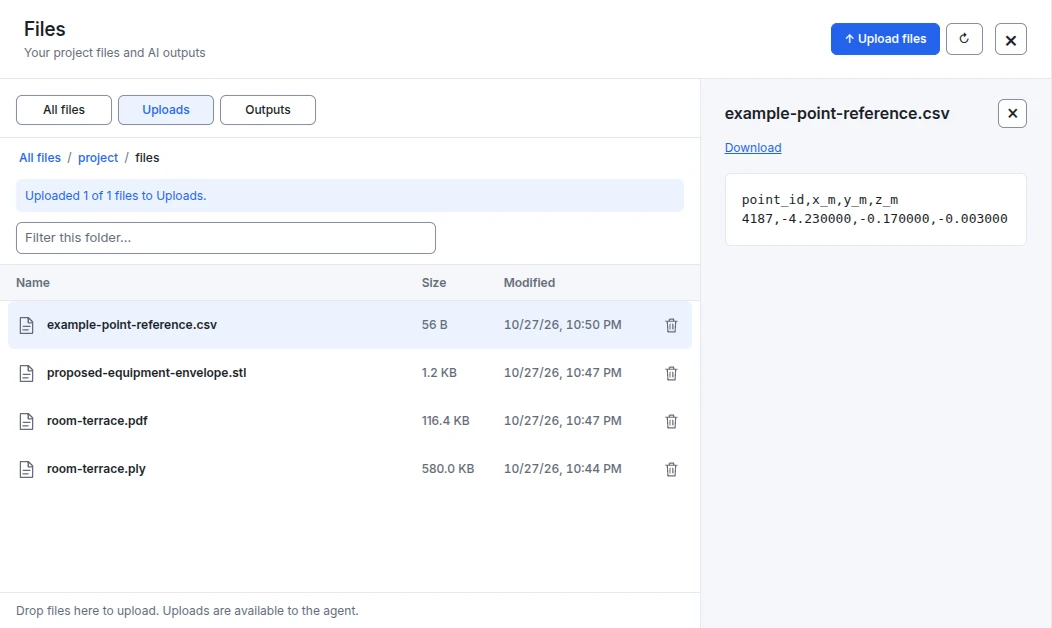
The CSV is a reference uploaded for this guide and contains the selected point’s coordinates. It is not an AI-generated measurement report.
- Upload files. Add references to the project. Wait until the upload completes before asking the agent to use them.
- Uploads. Browse supplied files and select a filename to preview it.
- Outputs. Switch here for files generated during the work. Ask the agent for the final filename when several revisions exist.
- Download. Save the selected file to your device. If a PDF or other preview is unavailable in your browser, download it and open it in a suitable application.
What is saved
CADground saves scene changes in the project. It stores conversations and files separately from the current view. Return to the same project and scene to continue the task.
Reloading the page does not undo work. Stop does not undo completed edits. Reset scene removes scene work; it does not just reset the camera. Download a copy of important work before a large reconstruction or reset.
A CADground JSON export saves scene data. It does not back up your account, every upload, or all conversations. Keep the original scan and reference files with the scene export.
Export geometry
- Finish the relevant review checks. Confirm the active source and intended geometry.
- Open the Tools window from the View menu.
- In the geometry controls, select the export format: STEP (.step), STL (.stl), or CADground (.json).
- Select Download. File → Download scene also uses the current scene export format.
- Save the file with a name that identifies its version.
- Open it in the destination application and check scale, orientation, part count, openings, and a known dimension.
| Format | Choose it when | Important distinction |
|---|---|---|
| STEP | You need to transfer the scene’s CAD geometry to another application. | Exporting STEP does not reconstruct a raw point cloud. It also does not guarantee that each part is an analytic solid. Check the exported geometry. |
| STL | You need triangulated geometry for a mesh-based workflow. | STL does not keep a full CAD feature history or reliable unit information. Set the correct units when importing it into another application. |
| CADground JSON | You need scene data to import into CADground later, or a copy of the current version. | Keep the scan and reference files too. JSON is not a backup of the whole project. |
| PDF / PNG / SVG / CSV | You need a report, drawing, annotated image, or measurement table. | These are files the agent can generate for the task; they are not additional entries in the geometry-export selector. |
Native RVT, IFC, DWG, and DXF export is not currently provided. If another application needs these formats, first agree a supported way to transfer the geometry.
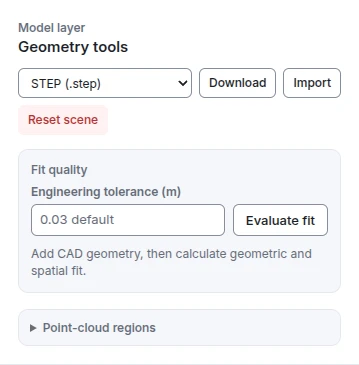
This screenshot shows the controls before a fit check. It does not show a passed result.
- Export format. Choose STEP, STL, or CADground JSON for the geometry or scene data you intend to save.
- Download. Export using the selected format. A raw point cloud does not become reconstructed CAD simply by choosing STEP.
- Engineering tolerance. Enter the tolerance in meters; for example, 0.03 m is 30 mm. Choose a value justified by your task and evidence.
- Evaluate fit. Run this after adding geometry. Read the result and inspect the visible differences. A fit score alone does not prove that the model is complete or the units are correct.
Ask for a report
Prepare a PDF report of the checked equipment-clearance study. Name the source and reference files and state the units. Add a plan view, two labeled 3D views, and a measurement table. List my supplied requirements and any unresolved questions. Save the PDF and a CSV table in Outputs. Tell me the final filenames.
- Wait for the agent to finish generating the files; a promise to create a report is not the report itself.
- Open Files → Outputs and select the named PDF.
- Review every page for clipped labels, unreadable dimensions, wrong units, and draft assumptions.
- Request corrections in the same conversation, then download the corrected revision.
Restore or reopen a scene export
Use File → Import scene JSON… for a CADground scene document. Check the project first and save a copy of current work. This action does not accept other JSON files, point-cloud metadata, or conversation exports.
If the scene opens without its source, check that the original file is still available. A report records the work at the time it was created. Later scene changes do not update that report automatically.